Blank Order Quest Diagnostics Form
Key takeaways
Here are some key takeaways about filling out and using the Order Quest Diagnostics form:
- Accurate Information: Ensure that all personal details, including your surname, date of birth, and sex, are filled out correctly. This helps avoid any mix-ups with your results.
- Ordering Physician: The form requires the name of the ordering physician. Make sure to include both the first name and surname.
- Fasting Requirements: If fasting is required for your tests, indicate this clearly on the form. This is crucial for accurate results.
- Insurance Details: If applicable, fill in your insurance reference and indicate who will be responsible for the fees. This could be the doctor, patient, or insurance company.
- Patient Address: Provide your address only if you are expecting to receive an invoice. This ensures that the billing process goes smoothly.
- Clinical Details: Select the specific tests you need from the options provided. This helps the lab process your samples correctly.
- Sample Type and Reason: Specify the sample type and reason for the test, especially if it involves a smear. This information is vital for the lab.
- Check for Duplicates: If you want a duplicate report sent to another physician, make sure to include their details on the form.
Common mistakes
Filling out the Order Quest Diagnostics form can be straightforward, but there are common mistakes that can lead to delays or issues with processing. One frequent error is leaving out the Account Code. This code is crucial for identifying the patient’s account and ensuring that the billing process runs smoothly. If you do not have an account code, be sure to provide the necessary information to avoid complications.
Another mistake is failing to include the Ordering Physician's Name. This information is essential for the lab to know who is requesting the tests. Without it, the report may not be sent to the correct physician, causing confusion and potential delays in patient care. Always double-check that this section is filled out completely.
Many people also overlook the Date Collected and Time Collected fields. These details are important for the lab to track when the sample was taken. Incomplete information can lead to questions about the validity of the test results. Make sure to enter this information accurately, using the correct format.
Providing Patient Address is often neglected, especially if the patient is not receiving an invoice. However, including this information is vital for communication purposes. If the lab needs to reach out to the patient or send any correspondence, having the correct address on file is essential.
Finally, be cautious with the Clinical Details section. Selecting the wrong tests can result in receiving incorrect results or delays in diagnosis. Carefully review the options and ensure that the appropriate tests are marked. Taking the time to fill out the form accurately can prevent unnecessary complications and ensure that the patient receives the right care.
Misconceptions
Misconceptions about the Order Quest Diagnostics form can lead to confusion. Here are eight common misunderstandings, along with clarifications:
-
Only doctors can fill out the form.
While a doctor usually completes the form, patients can provide necessary information, especially if they are self-referring.
-
The form is only for blood tests.
The form covers a variety of tests, including urine tests and other samples, not just blood work.
-
Fasting is always required.
Fasting is only necessary for specific tests. Always check the requirements for your particular test.
-
Insurance information is optional.
Providing insurance details can help with billing. It’s best to include this information if applicable.
-
The form is only for adults.
This form can be used for patients of all ages, including children. Just ensure the correct information is provided.
-
All tests are done at the same time.
Tests can be done separately, depending on the patient's needs and the doctor's orders.
-
You must know your account code.
If you don’t have an account code, the form can still be processed. Just provide the necessary patient and physician information.
-
Results are sent only to the doctor.
Patients can request that results be sent to them as well. Just indicate this on the form.
Dos and Don'ts
When filling out the Order Quest Diagnostics form, it's important to follow specific guidelines to ensure accuracy and efficiency. Here are five things you should and shouldn't do:
- Do provide accurate personal information, including your full name, date of birth, and contact details.
- Do indicate whether you are fasting or pregnant, as this information is crucial for test results.
- Do ensure that the ordering physician's details are complete and correct.
- Do select the appropriate tests needed for your diagnosis clearly.
- Do double-check all entries for clarity and completeness before submission.
- Don't leave any required fields blank, as this can delay processing.
- Don't use abbreviations or unclear terms that could lead to misunderstandings.
- Don't forget to provide the insurance information if applicable.
- Don't submit the form without a signature if required.
- Don't write in the designated office use sections; this can cause confusion.
Other PDF Forms
Step 4 Aa Big Book - By identifying flaws, you take the first step towards addressing them head-on.
The process of managing property disputes can be complex, but having the right resources can simplify it. For instance, a thorough understanding of the Deed in Lieu of Foreclosure form can provide significant advantages in avoiding the burdens of foreclosure. Engaging with this document allows both lenders and borrowers to navigate property ownership transitions more effectively.
Durable Power of Attorney Florida - This form can significantly reduce the stress associated with vehicle title and registration issues.
Detailed Guide for Writing Order Quest Diagnostics
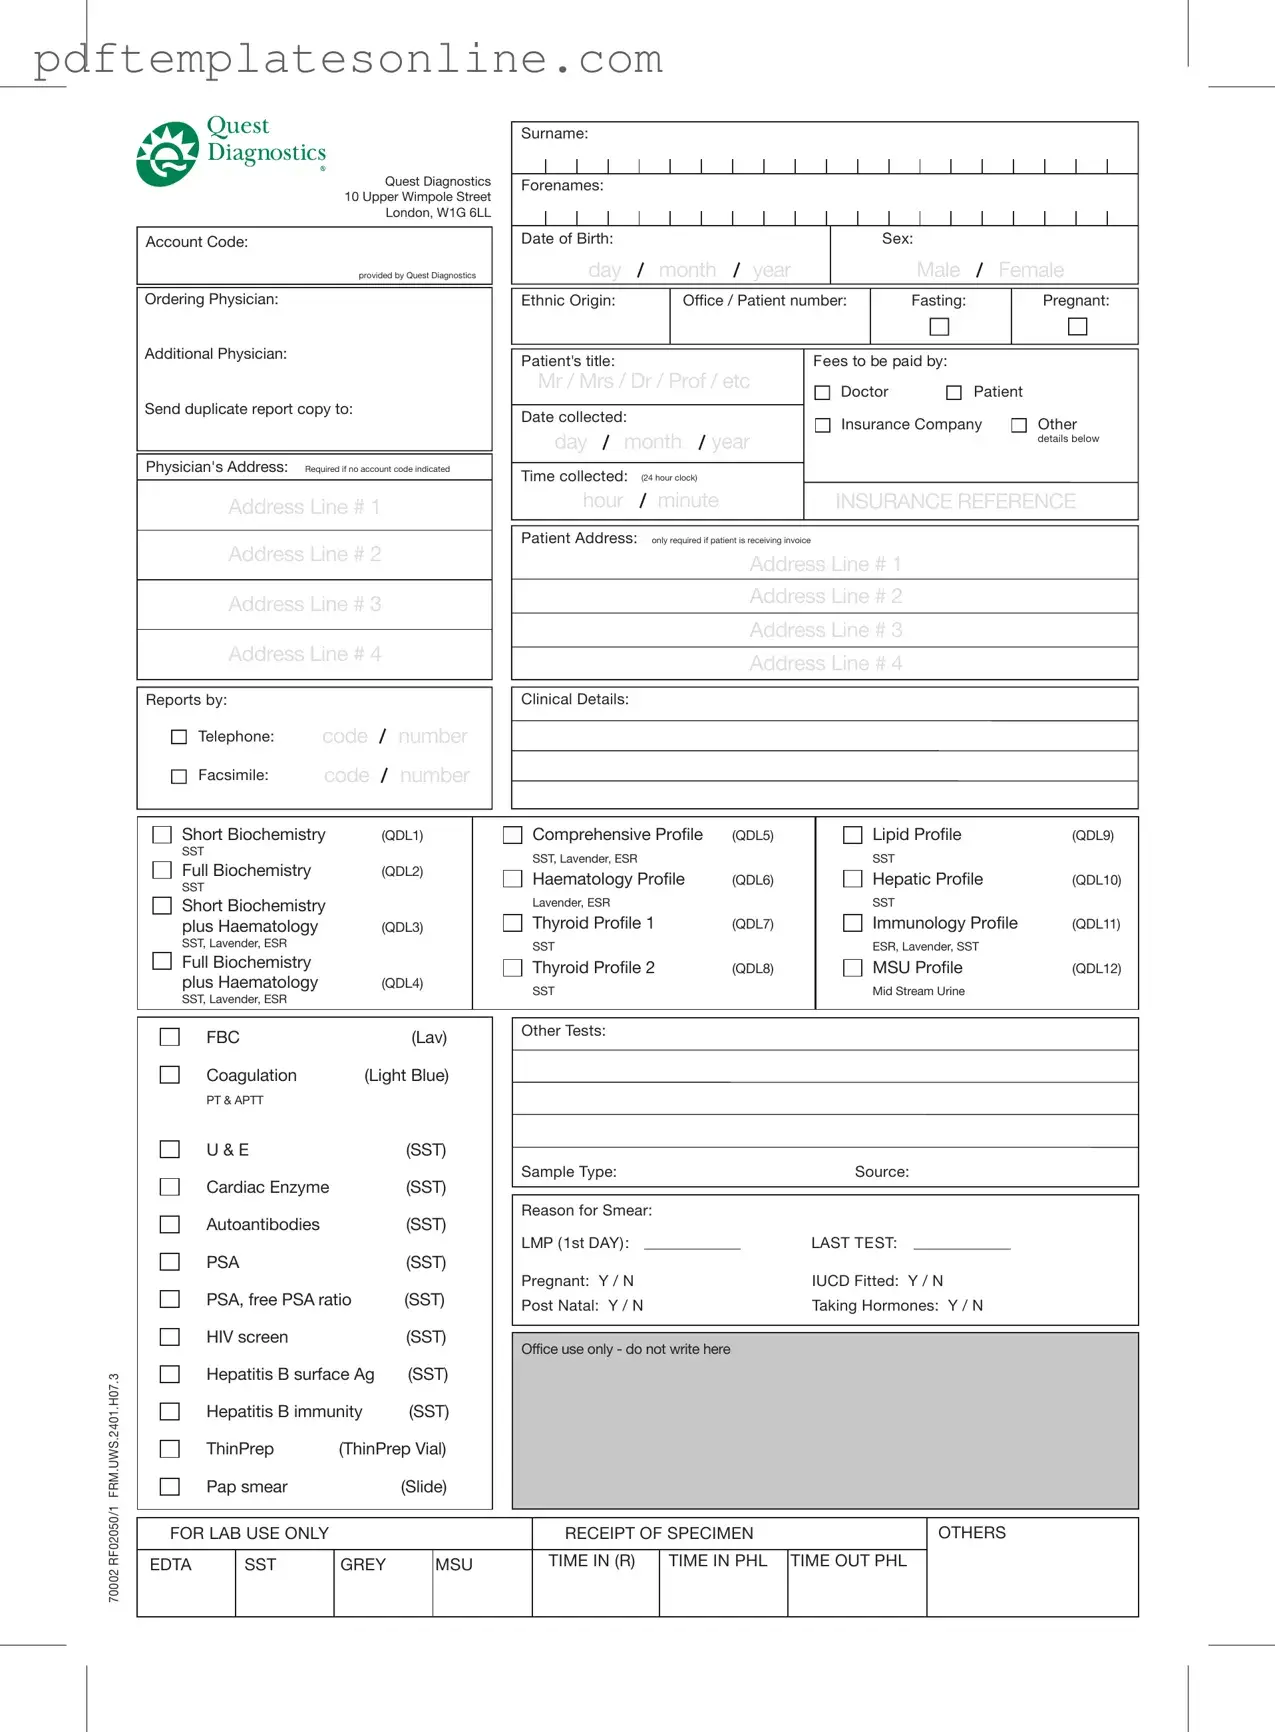
Filling out the Order Quest Diagnostics form is a straightforward process that requires accurate information to ensure proper testing and reporting. Follow these steps carefully to complete the form correctly.
- Enter your surname in the designated field.
- Provide the account code if you have one; this will be given by Quest Diagnostics.
- Fill in the ordering physician's name and their address.
- Input your forenames, date of birth (day, month, year), and sex (select Male or Female).
- Specify your ethnic origin and office/patient number.
- Indicate if you are fasting and if you are pregnant.
- If applicable, enter the name of an additional physician.
- Provide the physician's address if no account code is indicated.
- Fill in your patient title (Mr, Mrs, Dr, Prof, etc.).
- Record the date collected (day, month, year) and the time collected (in 24-hour format).
- Choose who will pay the fees: Doctor, Patient, Insurance Company, or Other.
- If using insurance, enter the insurance reference.
- Complete the patient address fields if you are receiving an invoice.
- Provide clinical details by selecting the relevant tests from the list.
- Fill in the sample type and source.
- State the reason for smear and provide LMP (last menstrual period) date if relevant.
- Indicate if you are pregnant, if an IUD is fitted, if you are post-natal, and if you are taking hormones.
After completing the form, review all entries for accuracy. Ensure that the information is clear and legible. This will facilitate a smooth process for your testing and reporting needs.